Published by Contentify AI
- Introduction
- Choosing the Right Solar PV Panels
- Site Assessment and Preparation
- Solar PV Panel Installation Process
- Connecting to the Grid
- Monitoring and Maintenance
- Benefits of Solar PV Panels
- Common Challenges and Solutions
- Conclusion

Key Takeaways
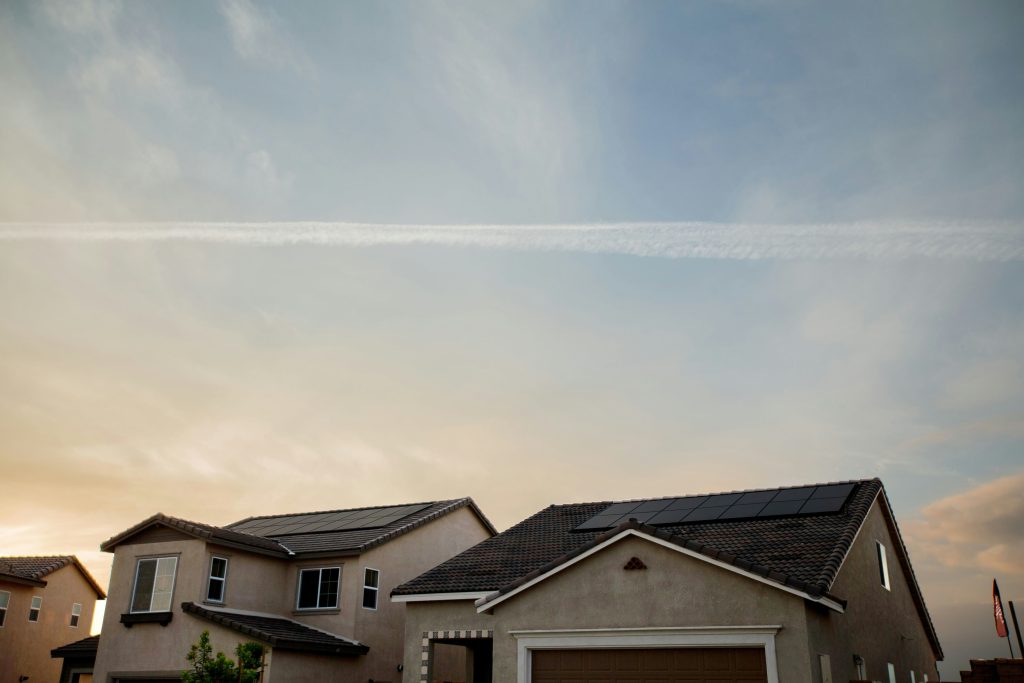
- Solar PV panels are installed on rooftops to capture sunlight and convert it into electricity.
- The installation process involves assessing the roof, securing the panels with mounts, connecting the panels to an inverter, and integrating with the electrical system of the building.
- Proper installation of solar PV panels can significantly reduce electricity bills and contribute to environmental sustainability.
Introduction
Harnessing the power of the sun through solar photovoltaic (PV) panels is an increasingly popular way to produce clean, renewable energy. For those looking to reduce their carbon footprint and save on electricity bills, understanding the process of installing solar PV panels is essential. This step-by-step guide to installing solar PV panels will walk you through the entire journey, from selecting the right panels to connecting them to the grid and ensuring they operate efficiently. Whether you’re a DIY enthusiast or planning to hire professionals, this guide aims to make the installation process accessible and straightforward.
Choosing the Right Solar PV Panels
When choosing the right solar PV panels for your installation, the first consideration is the type of panel that best suits your needs. There are primarily three types to choose from: monocrystalline, polycrystalline, and thin-film panels. Monocrystalline panels are known for their high efficiency and sleek appearance but come with a higher price tag. Polycrystalline panels are more affordable and slightly less efficient, while thin-film panels offer flexibility and are typically used in large-scale installations or unconventional spaces.
Next, evaluate the efficiency and wattage of the panels. Efficiency rates indicate how well a panel converts sunlight into electricity, and higher efficiency panels can produce more power in less space. However, they are often more expensive. Wattage is another crucial factor, as it determines the total energy output of your system. Make sure to calculate your energy needs to choose panels with the right wattage capacity.
When following this step-by-step guide to installing solar PV panels, it’s also essential to check for certifications and warranties. Look for panels certified by recognized standards such as the IEC (International Electrotechnical Commission) to ensure quality and reliability. A robust warranty can offer peace of mind, covering performance and material defects for up to 25 years.
Lastly, consider the brand reputation and customer reviews. Trusted brands often offer better customer support and reliability. Reading user reviews can provide insights into real-world performance and potential issues.
Taking these factors into account will help you choose the right solar PV panels, ensuring a successful and efficient installation process.
Site Assessment and Preparation
Site assessment and preparation are critical steps in the “Step-by-Step Guide to Installing Solar PV Panels.” Begin by evaluating the location where the panels will be installed. The primary focus should be on the roof’s orientation and tilt, as these factors significantly affect the panels’ efficiency. Ideally, the roof should face south in the Northern Hemisphere or north in the Southern Hemisphere to maximize sunlight exposure throughout the day.
Next, assess any potential obstructions such as trees, buildings, or chimneys that might cast shadows on the panels, reducing their efficiency. It’s essential to trim or remove these obstacles if possible. Additionally, check the roof’s condition and structural integrity. The roof must be in good shape and capable of supporting the additional weight of the solar PV panels and mounting hardware. If the roof needs repairs or reinforcement, complete these tasks before proceeding with the installation.
Another important aspect is the local climate and weather patterns. While solar panels are designed to withstand various weather conditions, heavy snowfall, strong winds, or frequent hail can impact their performance and longevity. Ensure that the selected site is suitable for long-term solar energy production given the regional climate.
Finally, obtain any necessary permits and approvals from local authorities. Regulations regarding solar panel installations vary by location, so it’s crucial to comply with local building codes and zoning laws. Engaging with a qualified solar installer can help navigate this process smoothly, ensuring that all legal and safety requirements are met.
By carefully conducting a site assessment and thorough preparation, you set a solid foundation for the successful installation of your solar PV panels, paving the way for efficient and effective energy production.
Solar PV Panel Installation Process
The solar PV panel installation process begins with mounting the panels. First, secure the mounting hardware to the roof or ground, ensuring it is aligned properly to maximize sun exposure. Roof mounts require careful attention to waterproofing to prevent leaks. Once the mounts are in place, attach the solar panels securely using the specified brackets.
Next, electrical wiring is connected. This step involves linking the solar panels together in a series or parallel configuration, depending on the system design. It’s crucial to use the appropriate wiring and connectors to ensure safety and efficiency. Once connected, the wires run to an inverter, which converts the direct current (DC) produced by the panels into alternating current (AC) used by most household appliances.
After wiring, install the inverter and connect it to your electrical panel. Inverters can be installed indoors or outdoors, but they should be placed in a cool, shaded area to ensure optimal performance. Follow the manufacturer’s guidelines for installation and ensure all connections are secure and weatherproof.
Grounding the system is the next step. Proper grounding protects the system and home from electrical surges and ensures compliance with local electrical codes. Use a grounding rod and connect it to the system following the specified procedures.
Finally, conduct a thorough inspection and testing. Check all connections, mounts, and wiring to ensure everything is secure and correctly installed. Power up the system and monitor its performance to confirm it is operating efficiently. If any issues arise, address them promptly to avoid long-term problems.
By meticulously following these steps, you can ensure a smooth and successful installation process, laying the groundwork for efficient and effective solar energy production.
Connecting to the Grid
Connecting your solar PV panels to the grid is a critical step in the installation process. First, ensure that all wiring from the solar panels to the inverter is secure and correctly connected. The inverter plays a vital role in converting the direct current (DC) generated by your panels into alternating current (AC), which is used by your household appliances and can be fed back into the grid.
Next, you will need to install a metering system. This involves setting up a bi-directional meter, which measures the electricity you consume from the grid and the excess energy your solar system sends back. This setup is essential for net metering, allowing you to receive credit for the surplus energy generated by your solar PV panels.
Once the metering system is in place, it’s time to connect the inverter to your main electrical panel. This step usually requires a licensed electrician to ensure compliance with local electrical codes and safety standards. The electrician will integrate the inverter with your home’s electrical system, ensuring that the power flows seamlessly between your solar panels, home, and the grid.
After all connections are made, the next step is to get approval from your utility company. They will likely conduct an inspection to ensure your solar installation meets all regulatory requirements and safety standards. Once approved, your system will be officially connected to the grid, and you can start generating and using solar energy.
Following this step-by-step guide to installing solar PV panels not only ensures a smooth installation process but also maximizes the efficiency and benefits of your new solar energy system. By carefully connecting your system to the grid, you can enjoy the financial and environmental advantages of solar power while contributing to a more sustainable future.
Monitoring and Maintenance
Regular monitoring and maintenance are crucial to ensure the optimal performance and longevity of your solar PV system. Begin by establishing a routine schedule for visual inspections. Check for any physical damage, such as cracks or dirt accumulation on the panels, which can reduce their efficiency. Cleaning the panels periodically, especially in dusty or pollen-heavy environments, can help maintain their effectiveness.
Next, monitor the system’s performance using the inverter display or a dedicated solar monitoring system. Modern inverters often come with online monitoring capabilities, allowing you to track energy production and identify any irregularities remotely. Keeping an eye on performance data helps in quickly detecting issues such as reduced energy output or system faults, enabling timely interventions.
Additionally, it’s important to inspect the electrical components and connections regularly. Look for any signs of wear and tear, corrosion, or loose connections that could impact the system’s efficiency and safety. Ensuring that all wiring and junctions are intact and secure can prevent potential electrical hazards and maintain consistent energy production.
Performing regular maintenance checks on the inverter is also essential. Ensure it is operating under optimal conditions and is free from dust and debris. Most inverters have indicator lights or alerts to signal if something is wrong. Addressing these alerts promptly can prevent minor issues from becoming major problems.
For those who prefer a professional touch, scheduling an annual maintenance visit from a certified solar technician can be beneficial. They can perform a more thorough inspection and maintenance routine, ensuring that your system is operating at peak performance.
By following these monitoring and maintenance practices as part of the “Step-by-Step Guide to Installing Solar PV Panels,” you can maximize the efficiency and lifespan of your solar energy system. Regular attention to your system ensures that you continue to reap the financial and environmental benefits of solar energy for years to come.
Benefits of Solar PV Panels
Switching to solar energy comes with a host of benefits that make the investment worthwhile. One of the most significant advantages is the reduction in electricity bills. By generating your own power, you decrease reliance on traditional utility companies, leading to substantial cost savings over time. In some cases, homeowners can even earn money through net metering by exporting excess energy back to the grid.
Environmental benefits are another compelling reason to follow a step-by-step guide to installing solar PV panels. Solar energy is a clean, renewable resource that significantly reduces carbon emissions and helps combat climate change. By opting for solar power, you contribute to a healthier planet and promote sustainable energy practices.
Solar PV panels also offer energy independence. By producing your own electricity, you are less vulnerable to energy price fluctuations and supply disruptions. This self-sufficiency can be particularly valuable in areas prone to power outages or in remote locations where access to the grid is limited.
The installation of solar PV panels can also increase property value. Homes equipped with solar energy systems are often more attractive to buyers, fetching higher market prices. This added value can make your property a more enticing investment for future resale.
Additionally, there are various financial incentives and tax credits available for solar panel installations. Governments and local authorities often provide subsidies, grants, or rebates to offset the initial costs, making the transition to solar energy more accessible and affordable.
Finally, solar PV technology has become increasingly reliable and durable. Modern solar panels require minimal maintenance and can last for 25-30 years or more, ensuring a long-term, hassle-free energy solution. With advancements in technology, solar systems are also becoming more efficient and cost-effective.
By following a step-by-step guide to installing solar PV panels, you can unlock these numerous benefits, from financial savings and environmental impact to increased property value and energy independence.
Common Challenges and Solutions
One common challenge when installing solar PV panels is dealing with shading issues. Even a small amount of shade on a single panel can significantly reduce the efficiency of the entire system. To address this, it’s essential to conduct a thorough site assessment before installation. Use tools like Solar Pathfinders or perform a detailed shading analysis to identify and mitigate potential shading obstacles.
Another hurdle is handling complex roof structures. Roofs with multiple angles, dormers, or other architectural features can complicate the installation process. In such cases, consider consulting with a structural engineer or a professional installer to design a mounting system that accommodates the unique roofline while maintaining optimal panel orientation and tilt.
Weather conditions can also pose challenges during the installation process. High winds, heavy rain, or extreme temperatures can delay installation or affect the quality of the work. Planning the installation during a period of stable weather can help avoid these issues. Additionally, ensure that all mounting and electrical components are weatherproof and suitable for the climate in your area.
Electrical integration is another critical aspect where challenges often arise. Properly connecting the solar PV system to the existing electrical grid requires knowledge of local electrical codes and regulations. It’s advisable to hire a licensed electrician to handle this part of the process. They can ensure that the system is safely and correctly integrated, preventing potential electrical hazards and ensuring compliance with all legal requirements.
Finally, ongoing maintenance and monitoring can present challenges if not properly planned for. Regular inspections and cleaning are necessary to maintain the efficiency and longevity of your solar PV system. Investing in a solar monitoring system can help you keep track of the system’s performance and identify issues early. Setting up a maintenance schedule and possibly arranging periodic professional check-ups can ensure your system continues to operate at peak efficiency.
By anticipating these common challenges and implementing the suggested solutions, you can navigate the installation process more smoothly. The “Step-by-Step Guide to Installing Solar PV Panels” provides a comprehensive approach to overcoming these hurdles, ensuring a successful and efficient solar energy system.
Conclusion
Navigating the challenges associated with solar PV panel installation is crucial for a successful project. One common issue is shading, which can significantly reduce system efficiency. To mitigate this, conduct a thorough site assessment using tools like Solar Pathfinders to identify and address shading obstacles before installation.
Complex roof structures present another challenge. Roofs with multiple angles or architectural features can complicate the mounting process. Consulting with a structural engineer or professional installer can help design a mounting system that accommodates unique rooflines while ensuring optimal panel orientation and tilt.
Weather conditions can also hinder the installation process. High winds, heavy rain, or extreme temperatures can delay work or affect installation quality. Planning the installation during stable weather periods and using weatherproof components can help avoid these issues.
Electrical integration is another critical aspect where challenges often arise. Properly connecting the solar PV system to the existing electrical grid requires knowledge of local electrical codes and regulations. Hiring a licensed electrician ensures the system is safely and correctly integrated, preventing potential electrical hazards and ensuring compliance with legal requirements.
Ongoing maintenance and monitoring can present challenges if not properly planned. Regular inspections and cleaning are necessary to maintain the system’s efficiency and longevity. Investing in a solar monitoring system helps track performance and identify issues early. Setting up a maintenance schedule and arranging periodic professional check-ups ensure your system continues to operate at peak efficiency.
By anticipating and addressing these common challenges, you can navigate the installation process more smoothly. This approach aligns with the principles outlined in any comprehensive step-by-step guide to installing solar PV panels, ensuring a successful and efficient solar energy system.